Thursday, March 22, 2012

Picture Wall


We recently decided to mount our tv on the wall to save space. The spot where we mounted it was where my picture wall used to be. The pictures really needed to be updated. None of them included Julian. I made the picture wall in December 2009. Yeah...that long ago! Since I have recently been trying to simplify our house (less furniture, more functional), I had an empty wall in the dining room....which will now be my NEW picture wall. I've looked at lots of inspirational photos on Pinterest, and was finally motivated by this one. Buying all of the frames, and printing quality pictures, can get pretty costly. For this project, I used frames that we already had (purchased at Costco in 2009), and went cheap, and printed the pictures at Costco also. I know, not as great of picture quality, but if I were to order prints from the ideal place (like mpix), it would cost at least 5 times as much. Prints for this project cost me about $30 from Costco. 

I like the look of more eclectic photo walls, with different frames, randomly placed...but, my goal for our home right now is simplicity. That's why I decided to keep all the same frame, in the same color. First, I identified the wall, and placed tape across the middle as a reference point. All the pictures will go above or below it.  I measured the wall, so I would know how big to plan out the frames when spacing them out on the floor.

Things to think about when planning picture wall:
  • matting or no matting
  • color or black & white photos (choose ONE)
  • different size frames or all the same
  • how large of a wall
  • how many photos
  • where to purchase frames (if you want all the same, IKEA is a great place)
  • what pictures to use (I think it looks better with pictures all of the same "photoshoot"
  • randomly spaced or more organized


 Then, I laid the frames out on the ground, and played around with the positioning, until I found something I liked. I really wanted to cover that ugly white outlet cover on the top right (behind it is a random cable that we don't use. What an awkward place!). I didn't want to cover the light switch, so I kept that in mind when mapping it out.


Then, I made a collage in Picasa to get an idea of what pictures to use. I found it a lot easier to be able to see the placement of the photos. Have I mentioned how much I LOVE Picasa? It's also how I made this collage for Julian's 1st Birthday, which I picked up on Monday, and it looks beautiful! The only thing I regret it adding my own white border to it, because Costco adds a 1/2 inch white border also, which made it a bit too big. Oh well...it still looks great.

We had a family photo shoot last fall, with over 150 pictures to choose from (none of which were represented in my home).

The pictures in this collage aren't exactly to scale, but it gave me a good idea of how it would turn out.


If you haven't used Picasa before, it's really easy. Just google "free Picasa download", then download it. To make a collage, just click on a picture, then click on "Collage" at the bottom. You can drag more pictures into the collage, and position them however you like. Once you are done, click "Create Collage". Then "Export" it. If these directions are too simple, you can follow this tutorial that I used when I made my first blog header. 


Adrian volunteered to put the pictures in the frames. He actually said, "Can I put the pictures in the frames?", in a really excited voice. He also said, "Don't take a picture of me!"....sorry babe.


I was struggling for about 10 minutes to get the tape level, then I remembered that Adrian has a laser level. That helped a lot! I didn't take out the white anchors in the wall because I thought the picture frames would cover them. All but one was covered, so I still need to take out that one (far left), then patch and paint the hole. Or...I may just leave it.....


I cut these little slips of paper so that I wouldn't have to measure each time for the spacing in between and where the nail would go. 


I started on the far right, mainly because my goal was to cover that ugly white square. (scroll up for pic)


I love how it came out! In my opinion, choosing pictures that match your home decor is important. If we were all wearing yellow and orange, it might look out of place in my house.


All I see in this picture are our ugly baseboards, and yucky carpet. The carpet is coming up in the next couple months, and will be replaced with wood laminate and new baseboards!

Wednesday, March 21, 2012

Creamy Pumpkin Pasta {Vegan}


Last summer I really had the craving for pumpkin...pumpkin everything! The problem was that I couldn't find canned pumpkin anywhere! I'm not talking about pumpkin pie filling, or pumpkin with tons of sugar and other gunk, just pumpkin in a can! I literally called Trader Joe's every week asking if they had got their canned pumpkin in yet. FINALLY one week, I walked in, and there it was! Lots and lots of canned pumpkin. I was so excited. I bought about 5 or 6 cans. I really wanted to buy more, but it was $2.99 a can, so I hesitated. Sadly, it's only March, and I've used up the last can of pumpkin on this recipe. Waaaaahhhh! I told Adrian that this year I would be buying at least 15 cans! He looked at me like I was nuts.

The last time I made something with pumpkin, was when I made these (non-vegan) Pumpkin Chocolate Chip Muffins. I think I could easily make those vegan by subbing the eggs for another leaven-er.

(Recipe slightly adapted from here)

Ingredients:
1 pound of cooked pasts (your choice)
2 tbsp olive oil
1 sweet onion, roughly chopped
4-5 cloves garlic, choppped
1 (14 oz) can organic pumpkin (not pumpkin pie filling)
2 tbsp tomato paste
2 cups soy, almond, or rice milk
1 tsp ground nutmeg
2 tsp agave nectar (or maple syrup)
3 tsp sea salt
1/2 tsp freshly ground pepper

In a large pan, cook the onions and garlic in the olive oil until soft. 


Once the onions and garlic are cooked, add all of the ingredients to the blender. Puree until smooth.


Pout the pureed sauce back into the pan that the onions and garlic were cooked in. Simmer on medium-low until hot.


Toss with pasta! I used the pasta that I had on hand. I didn't make a full pound of pasta, so I had a lot of leftover sauce, and decided to freeze it.


I've heard a lot of comments from people saying, "I can't eat vegan, it's too hard." What I have to say about that is NO! It's not hard at all. All of the ingredients that I have used have been purchased from a regular grocery store (like Vons, Costco, Sprouts, Target). Not from a crazy expensive place that is totally out of the way (like Whole Foods). Preparing a vegan meal isn't any harder or more expensive than preparing a non-vegan one. And, it tastes just as good! Take charge of your health! 

Here's a quick example of what I ate yesterday, and today:
Avocado Rolls
Meatless Spaghetti with extra veggies (mushrooms, bell peppers etc)
1 cup of beets
Seaweed Snack
Calcium enriched OJ
Graham crackers
Oatmeal with almond milk, flax seed and strawberries
Toast with coconut spread and raspberry jelly
Pumpkin Pasta leftovers

On another note, I called the Dr's office today, and scheduled physicals for Adrian and I. I'm really curious to see what our cholesterol (etc.) levels are. If you are interested in reading more about being vegan, check out this post from Truth and the Life. 

One of my favorite parts:
Spiritually, I have realized God has provided us, from the beginning, a perfect diet from The Garden of Eden. Before sin, Adam and Eve were given this amazing and beautiful garden that would perfectly nourish their bodies without having to consume animal products. He has re-assured me through verses in Genesis that clean eating is the best way to respect my body, as the temple it is. 

Better-Than-Chicken-Salad {Vegan}


This salad is so delicious! I've already made it twice in the past week. It stores well in the fridge, and you don't even have to heat it up to eat it. The kids loved it too. Check out all the veggies in it...


Ingredients:
2 (15.5 oz) cans garbanzo beans (chickpeas)
1/2 cup vegan mayo (I like Vegenaise)
1 tbsp dijon mayo
2 tbsp lemon juice
2-3 carrots, finely chopped
1 red bell pepper, finely chopped
2 celery stalks, finely chopped
4 green onions, finely chopped
handful of cilantro & parsley, finely chopped
salt & pepper to taste

Add the garbanzo beans to the food processor, and pulse until they are small flaky pieces.


Chop up all your veggies & herbs. I love this picture...eat the rainbow! 


If you would like a less crunchy salad, you can put the veggies in the food processor also. I made it like this the second time, and Adrian liked it better. I thought both ways tasted good. 


Stir the veggies/herbs into the garbanzo beans.


Add the vegan-mayo, mustard, lemon juice, salt & pepper. Stir to combine.


Serve on bread, or with crackers. Store covered in the refrigerator. Try to resist the urge to eat it straight from the container with a fork or spoon!


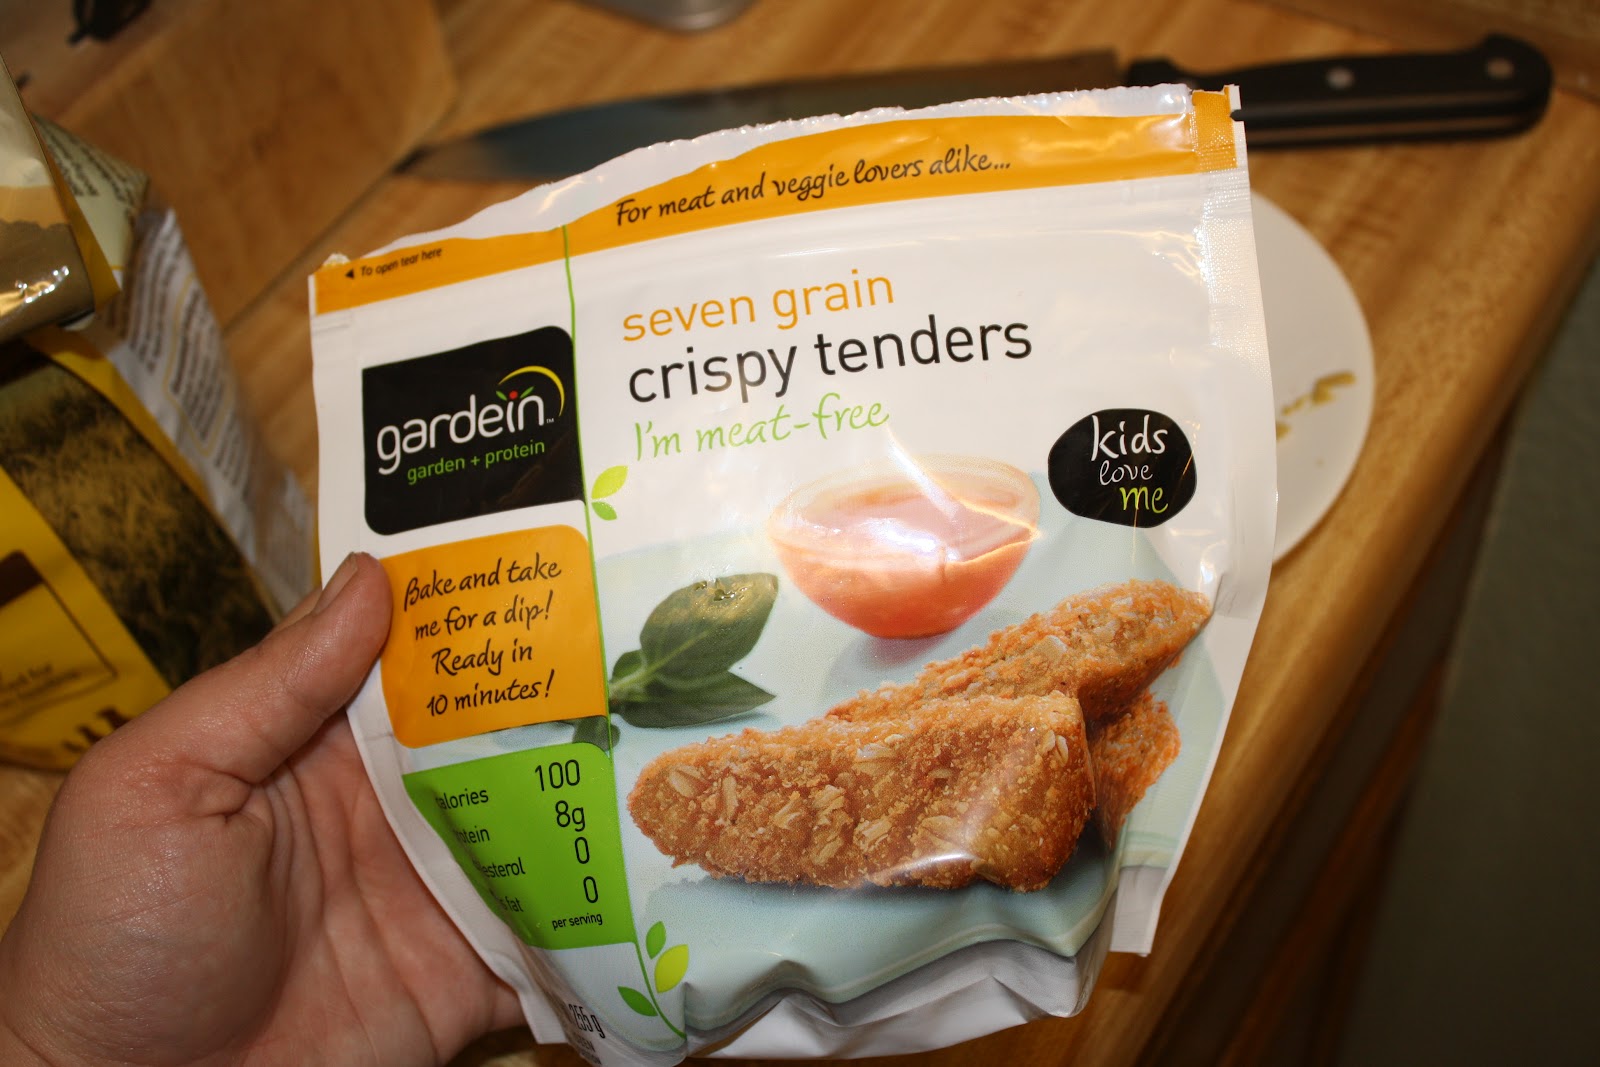
I also tried they "crispy tenders" made by Gardein (purchased at Target). They were really tasty! I ate them with some dijon mayo as a snack one day last week. I'm feeling really good eating vegan, and I haven't had the desire to eat meat once. Not missing it at all.


Our Disneyland Trip & My Birthday

Last Thursday we went to Disneyland. The kids loved it! Isabel is getting old enough that she remembers rides and is excited to go there. Here are a few pictures from our trip...
Waited in line for almost an hour to see her

Isabel's favorite- Tangled. She says that is her name, not Rapunzel

On Dumbo with my JuJu Bear

Her favorite spot

In Minnie's House


There was a pretend cake in the oven


Monday was my birthday...I turned 25! I had the best day with my kids and hubby. We tried out a vegan restaurant, and it was delicious! I got the whole family to go, and everyone loved the food. You don't have to be vegan to eat there. I can't wait to go back.
We I got a new car! 


Tuesday, March 20, 2012

Not Your Average Hummus Recipes {Vegan}

Hummus is way too expensive! I really don't get why is costs so much. You can get it at Costco at a pretty good price, but I don't like the flavors that they have. I decided to make it myself...the recipes are really easy, and extremely delicious! (They are also VEGAN.) I can't wait to try out some other varieties.

Beet Hummus:

I LOVE beets. I could eat a pound them just by themselves.  I bought beets from Costco that are already cooked, and peeled. They come in 8oz packages, which is perfect for this recipe. You can also cook your own beets in water until they are extremely soft, and then peel them.

Ingredients:
1 (15.5oz) can of chickpeas (garbanzo beans), drained and rinsed
1/2 lb beets, about 4 medium sized beets
4 tbsp lemon juice
1 tsp cumin
1 tsp salt
pinch of pepper
1 small garlic clove

Place all the ingredients in a food processor, and blend until smooth. I did the beets first, then added everything else. Serve with tortilla chips, or pita chips. Store covered in the refrigerator. You can also freeze it!


Yeah, it was that good!


Chocolate Chip Peanut Butter:

I know this recipe sounds really weird, but it's delicious! It tastes like you are eating peanut butter chocolate chip cookie dough....without the eggs! Just try it. (Recipe from here)

Ingredients:
1 (15.5oz) can of chickpeas (garbanzo beans), drained and rinsed
1/2 cup natural, creamy peanut butter (you can use any creamy kind, but if it's already sweetened, then you will want to use less blue agave)
1/4 cup blue agave nectar
1/2 cup semi-sweet chocolate chips (I used mini, and use Vegan if you would like)

Place all ingredients, except the chocolate chips, in the food processor until smooth. Fold in the chocolate chips. Serve with graham crackers. Store covered in the fridge. I haven't tried freezing this one.


Monday, March 19, 2012

Finally a Poster Print for Julian's 1st B-day


Julian turned one almost 5 months ago. I finally made a collage for him, and ordered the print on poster board! I 'm really excited, and I can't wait to get the poster put up in his room. Isabel has a similar one, that I purchased from the photographer that took her pictures. It's beautiful, but it was also very expensive! This time, I made a collage in Picasa----if you don't have it, get it! It's free, and it's also how I made my blog header. I hope the print looks as good as I think it's going to. This is my first time ordering a poster print made from my own collage. 

On another note, how beautiful is this quote! Encouragement for the week that I stole from here.


Related Posts Plugin for WordPress, Blogger...