Monday, February 27, 2012

Isabel is a BOY.....not!

The other day I was deleting pictures on the computer that I don't need-- usually after I publish a blog post, I delete those pictures. Not pictures of the kids, but pics of chicken cooking, veggies chopped...that kind of stuff that I would never need other than for the purpose of this blog. When I was doing that, I found this video. I have never watched this before. It's circa December 2008.

Here's a little preface: We went for a 3D Ultrasound when I was barely 15 weeks pregnant with Isabel (shhh! don't tell I was only 14 weeks 6 days, even thought you are supposed to be 15 to find out the gender of your baby). Well...I went too early. The lady told us that she was almost positive it was a BOY. Nope. Wrong. NOT A BOY! She said it multiple times, but did tell us to come back a week later so that she could double check. She also told us (off camera), that she had never been wrong in predicting the gender of babies in ultrasounds that she had done (for the past 20 years!). Maybe it's my fault because I went a day early, or because I should have just been more patient and waited until the 19 week ultrasound at the doctor. But, we really reeeaaalllly wanted to know the gender of the baby before Christmas. 

Adrian and I were so confident (that the baby was a boy), that we went out and spent 3 hours (or so) registering at Babies R US. Post baby #1, I realized, registries are pointless. Waste of time because no one buys off of them anyways, annnnnd...if you want to cheat, you can see ahead of time what people are buying you. (NO way did I do that ;) ) But, I still wouldn't discourage first time parents from registering. It's just so fun to do, and a right of passage for becoming a parent. 

It's an extremely long video. I would just watch the first part, and then skip to the end (no I do not know how to edit videos, not do I want to learn right now). Sorry Isabel for saying I wanted a boy. I didn't really mean that!

(took me over an hour and a half to upload!)

Saturday, February 25, 2012

Lazy Dinner

I had planned on making beef stew last night, but we were so busy with the garden all day that I was exhausted by dinner time. That's why I'm calling this LAZY DINNER!

This recipe is so easy, that it shouldn't even count as a recipe. Simple & yummy. Pesto can be pretty pricey, but I've found it at Costco at a pretty good price. You can see the jar in the background of the first picture. 22oz for $7.99. I only used about 1/3 of the container for this recipe. I can't wait to get the basil growing so I can make my own pesto! I'm planting a whole 4 foot row of just basil. :)

Baked Pesto Chicken
Printable Recipe

Ingredients:
2 large boneless skinless chicken breasts (sliced in half to make them thinner, then cut into strips)
2/3 cup pesto
salt & pepper
1/2 cup shredded mozzarella cheese

Preheat the oven to 375 degrees.

Spread 1/3 cup pesto in the bottom of a
glass pyrex pan. Add the chicken
Season with Salt & Pepper. 

Spread another 1/3 cup pesto on top
of the chicken.


Cover with foil. Don't forget, or the
chicken will dry out. Bake for 20 minutes,
or until the chicken is almost done cooking.
Take the foil off, and sprinkle with 1/2
cup shredded cheese. Place back in the oven
for another 5-10 minutes, or until the cheese
is golden. You can turn the broiler on
for this part.


Serve over pasta, brown rice, or quinoa! (pronounced keen-wah)  We ate it over quinoa cooked in chicken broth. We saved the extra pesto that was left in the pan and served with with any leftover chicken over angel hair pasta. Wasn't that easy?
We had about 1/2 cup of white rice left, (which we don't buy anymore), so I cooked it,  and mixed it in the with the quinoa. Isabel said it was the best rice she ever had!

Tree Planted & Strawberries Too!

We planted the tree this morning! First, the kids helped collect some rocks from our "extended" back yard. We put those in the bottom to help the soil drain. We also propped the wine barrel up on a couple bricks, so it's a couple inches above the ground (better draining).


Planted some Sequoia Strawberries around the top. We'll see how they do! The roots of the tree are going to be very deep in the barrel, and the strawberry roots are super shallow. I just need to get some sand or hay for around the bottom of the strawberries to prevent weeds.


Progress on Our Garden

You will eat the fruit of your labor; blessings and prosperity will be yours. 
-Psalm 128:2 
I can't explain how exciting it's been putting together our little garden in the backyard. It's such a fun, rewarding project that the kids can help out with. Isabel  loved planting the seeds with me, and she is extremely excited about all the other fruits and veggies we will have soon. I know I said before that we were going to wait to make planters, but we decided just to do it! We are not going to do a lot of veggies, so we will just start with plants (not seeds like the herbs).

The herbs are making some progress in their mini greenhouse. I saw a couple of them with teeny tiny sprouts (it's only been a couple days). We will probably work on putting up the rain gutters on the fench next weekend. It will be awhile until they are ready to be planted. The basil might sprout up within 5 days, but the rosemary and lavender could take up to 25 days.


The other day I read this amazing tutorial from Thy Hand Hath Provided to give me a jump start on learning how to start a veggie garden for us. The first step is planning your garden. (Just like I did with the herbs). The tutorial talks about making a planting schedule, but the one available on the blog wasn't specific to my area. I found this cool tool online that tell you what zone you are in for planting. I've learned so much! I didn't even know that there were zones! Today I've been reading about companion planting because I haven't for sure made a final decision on what fruits/veggies we will plant.

Our patio is all concrete except one small dirt square that is just shy of 4'x4'. It's not suitable for planting in, so based on the sun exposure, we decided to start with an above ground planter. I've seen a ton of friends making them, so I feel kind of like a copycat posting this. But, I want to share ours!


Here is a our little dirt square...full of the kid's toy balls. In the corner is the half wine barrel that we are planting a dwarf mandarin tree in. The tree can grow in there for years, and once we get a house we can transplant it into our yard! Also there is the pot for my tomatoes, and the blue (dirty) bucket is meant to hold ice and drinks, but I was thinking about drilling holes in the bottom and planting some flowers in it. See the white sign? We are going to paint that soon, with something quirky on it about our garden. I made it when I was pregnant with Julian, and have yet to do anything with it.  Like the Halloween mat?? The backyard is a work in progress...

The measurements for our square are 42"x46", and we are making our planter 12" high. If we had more space, I would have made it bigger simplified the size based on the lengths that the wood comes in. I didn't get a picture of all of the supplies before Adrian started, but here is what we used:

Planter
{$5.71} Galvanized Wood Screws
{$5.20} Waterseal Spray*
{$46.40} (2) 2in x 6in x 16ft pieces of redwood
CUT INTO:
(4) 38" long pieces
(4) 46" long pieces
(4) 12" long pieces **
We didn't get the soil for this yet, but it will be about $40
Total: $57.31

Mandarin Tree
{$29.90} Half Wine Barrel
{$23.98} Dwarf Mandarin Tree
{$14.91} 3 bags All Natural Patio Plus Potting Soil 
Total: $68.79

Tomatoes
{$9.90} Plastic Tomato Pot
{$3.48} Patio Tomatoes
{$3.48} Tomato Trellis
{$4.97} 1 bag All Natural Patio Plus Potting Soil 
Total: $21.83

*I wanted to avoid any chemicals, but caved in with sealing the wood to protect it
**I know we would only be able to cut 3 of these pieces from the wood listed above. Adrian was able to find a scrap at the store, so we wouldn't have to buy another big piece.
Planter:

We chose redwood because we really wanted a quality wood that would last. And since this planter will stay if we every move, I wanted it to look like a built-in. The 12" long pieces were for the corner supports.

Juju lost a shoe! Haha


I kept tried to keep the kids occupied while Adrian put it together. 

I love this picture! I think I'm going to frame it! (below)


They were "picking flowers". So cute.


Juju was a big helper! And the box is coming together....


For some reason, I really love this pic of Julian. I was trying to get him to smile in at me, but he just kept turning from side to side...with that little smirk :)


I thought the box looked too big, so I made Adrian test it. I got kind of scared, because I was the one who figured out and wrote down the wood to buy and measurements to cut it. Needless to say, it fit perfectly!

Isn' t that wood so purdy!

I still have to pull the weeds (aka: the most resilient mint ever! It's still growing from the previous owners over 3 years ago...even though we try to pull it out often.) I also need to clean up the area (rocks, a few kid's toys etc), and I'm going to till the soil a bit, so it will drain better.


Mandarin Tree
We also worked on the wine barrel for the dwarf mandarin tree. We almost planted the tree before we drilled holes for drainage in the bottom! Luckily we thought, "Maybe we should rinse it out", then realized that this thing was meant to hold wine (or whiskey), and nothing is seeping through it. I drilled all the holes by myself...working with power tools is fun! hahah!


I wanted larger holes, but this was the biggest drill bit Adrian had. Should work fine. I'm really excited about this project...I'm picturing how beautiful all kinds of things would look in these wine barrels. Maybe I will get more of these when we want more veggies, instead of making more planters (as I originally planned). They are only $29 each at Home Depot! Everywhere else that I've seen them, they have been over $100. That's a steal for this size container. A terracotta pot this size-- 30 gallons-- would be upwards of $250.


Here is our dwarf mandarin tree. I can't wait to see the joy on Isabel's face when she gets to pick an "orange" off the tree and eat it! Not planted yet, it got too late.


Tomatoes
And the tomato plant. Adrian laughed at how huge the pot was for the little tomato plant, but tomatoes like big pots!


Next thing I need to do it work on cleaning up the dirt in the veggie planter. Then we can get the soil and plant our veggies. I'm thinking of doing carrots, lettuce, strawberries & spinach in there. Need to decide for sure though...

Friday, February 24, 2012

Veggie Tomato Sauce and My FIRST Canning Experience


Continued from Intro to My First Canning Experience...

I made my own veggie-tomato sauce from scratch today. And...successfully canned it. Yes! That's a first for two things at once. Last night I went to bed early (around 9pm), and then woke up at 4am. Wide awake, and couldn't go back to sleep. I got up, ate some of my homemade granola. And then laid in bed for about 2 hours thinking about making and canning this tomato sauce. I was determined to do it today.

It wasn't very cost-effective (since I bought everything from the store this time), but the point of making it today was 1. to see how I like it, and 2. learn how to can. Once my garden gets up and going, I will have most everything to make this sauce in my little teeny tiny backyard. Now THAT is exciting! It turned out sooooo good that I'm even more motivated to get the tomatoes planted, and more anxious for the herbs to grow. Fresh organic herbs are expensive...compared them being (pretty much) free in my own back yard. Adrian says I have to first prove that I can keep the herbs and tomatoes alive, and then he will build an above ground vegetable planter like this, this or this-- I want a combination of the three. I definitely want mine on casters!

I plan on making a second batch of this tomorrow since I have enough of the ingredients left. (I wanted to do two batches, but Adrian recommended to just start with one and see how it tastes.) I'm also very exited about the ingredients...so many veggies hidden in there!


The Sauce (recipe very slightly changed from here)
2 tbsp olive oil
1 yellow sweet onion, chopped
3 cloves garlic, minced
2 carrots, shredded
1/2 green bell pepper, chopped
2 bay leaves
1/4 cup fresh parsley
2 tbsp. fresh basil, chopped (or 2 tsp. dried)
1 tbsp. fresh oregano (or 1 tsp. dried)
1 tbsp. fresh thyme (or 1 tsp. dried)
6 cups medium tomatoes, chopped (I used Roma)
1 small can (6 oz)  tomato paste
1 tbsp. honey
salt and pepper to taste


I reccommend chopping up all the veggies and herbs first. I really really don't like shredding carrots. All the other veggies went pretty fast. But, hopefully I will get a mini food processor for my b-day to make this part faster :). Ps: The garlic is hiding under the onions. I put them into three separate bowls based on which ingredients went into the pot at what time.

1. Onions and garlic. 2. Tomatoes 3.Carrots, bell peppers, and ALL herbs 

Yummy! Don't those look delicious! The best part of this recipe is that it isn't necessary to peel them.

Saute the onions and garlic in the olive oil until soft and transparent.
Add carrots, bell peppers, and all herbs.
At this point, I got a little too busy to take more pictures of the sauce making process....So, if you are canning this, you will need to heat up your jars, lids, boil the water ....and read the directions on how to cook everything at the same time. Next time it will be a lot easier, because I already have this process memorized.


Add the tomatoes, tomato paste, honey, and salt & pepper. Make sure to taste it. I ended up adding a lot more salt then I thought I would. (Next time I will measure it.) Continue to simmer for 15-30 minutes. I should have kept it covered, because I felt like a lot of the liquid evaporated, so I ended up adding about 1/2 cup of water.


Remove the bay leaves, and funnel into your hot canning jars, leaving 1/2 inch of headspace. Add 1 tbsp of vinegar or lemon juice to each jar and stir gently. Wipe the residue off the rims with a paper towel.  Place the hot lids on top and screw on the lids (fingertip tight, which means: not tight at all, just barely screw the lid on with your fingers).


Then place in your canner (aka: pot of boiling water), for 35 minutes.  In case you're wondering, that's a clean kitchen towel at the bottom of my pot to keep them from rattling around. 


Remove the jars and set on a kitchen towel on the counter.

Right after the jars were out of the canner, I had to run some errands. So...I didn't get to hear the magical "pop" that meant they sealed, but I was so excited to get home and gently run my finger over the lid and feel that they DID SEAL!

The recipe made (almost) 3 pints. I saved the 3rd to eat today for dinner. I ended up deciding to blend it in my magic bullet, rather than eat it chunky. It was delicious over some pasta and sprinkled with a little Parmesan cheese. The meal was a million times tastier just knowing that I made it! (And I felt good eating it with all the veggies in there) I can't wait to try it over some brown rice, on a baked potato, on some homemade pizza....what else can I think of?

Chunky (canned sauce) on the left, and blended on the right. I will probably blend it next time before I can it.

Intro to My FIRST Canning Experience...


Canning turned out to be really fun, and the best part was how rewarding it was, and how accomplished I felt after doing this ALL BY myself! I want to quote Jane from Thy Hand Hath Provided...my #1 source for all of my canning knowledge (thank you Jane if you're reading this):
"1) Canning is not hard.

2) You do not need tons of special stuff.

3) I'm going to show you exactly how to do it."


I'm not going to try and explain canning here, because I will just give you the link to where I learned it from....which is here. Follow the steps exactly! I also spoke to one of my Mom's friends (Thank you Rosa & Tony!). The steps he gave me were exactly the same as the tutorial. The one thing I was worried about, was not having a "canner"....both of my sources told me that it was completely unnecessary. I will trust Tony & Rosa's advice. Rosa said that they used to buy 1000 pounds (you read that right, ONE THOUSAND POUNDS) of tomatoes, and spend 3 days making and canning sauce from them. Wowza!

One thing I will explain, is what you'll need to can, and how much I spent on it...So you can see that it's really not that much, and it doesn't cost very much to get started either.

  1. Canning Jars (with rings, and NEW lids)-- If you are buying these brand new, you can use the lids that come with them. I bought a case (1 dozen) for about $8 at Target. The cheapest place I've found them. 
  2. A large pot, or canner if you want to get fancy. I used my 8 quart pot, because I only canned 2 jars this time. But I also have a 32 quart pot that I bought at Target for $21.19 when we made Tamales last year for Julian's birthday. 
  3. Jar lifter and Funnel<-- required. Headspace tool and magnetic lid lifter <---optional. I just bought this kit because I couldn't find the funnel or jar lifter on their own (other than online). It took me a few stores to find this, partially because it's not "canning season", but I eventually found it at Albertson's for $12.99. Albertson's also had the best selection (more variety of sizes) of canning jars and lids that I've found so far-- only slightly more expensive than Target.


Only after, I drank a yummy can of Young Coconut Juice with Pulp, did I realize that it had 40grams of sugar. Oops! I'm usually pretty good at reading the ingredients before hand.....


Apple Cranberry Granola


So, I'm pretty much obsessed with oats. I try to put them in everything I can: Zucchini Oat MuffinsOatmeal PancakesOatmeal Bread...I try to eat oatmeal for breakfast everyday. I got a little sick of it for a bit, so that's why I tried to change it up with recipes made with oats.

Here are some health benefits of Oats:

  1. Lowers Cholesterol: lots of fiber!
  2. Boosts your Immune System: Beta-Gluten
  3. Reduced the risk of Cardiovascular Disease: special antioxidants called avenathramides
  4. Stabilizes Blood Sugar: also because of the fiber
  5. Reduces Risk of Diabetes: magnesium helps the body properly use glucose
  6. PREVENTS BREAST CANCER: fiber from whole grains
  7. Gluten Friendly

I bought some really yummy granola from Sprouts the other day because it was on sale. I ate it like cereal with fresh berries and unsweetened almond milk. It was delicious! And... it was gone in 2 days! A friend made some granola at home that she said tasted really good...so, why not? I looked up a ton of recipes online, and I pretty much figured out that I could put anything I wanted into it. I combined some of the ingredients I already had, and asked Adrian what he would want in it (so he'll eat it too!).

This recipe was pretty good. I liked that there wasn't any sugar in it. Just applesauce & honey to sweeten it. You can pretty much put whatever you like into your granola as long as you maintain the wet/dry ratio. It turned out a little chewy for me (but still good). I like next time I will exclude the fruit and just eat with fresh fruit, or add the dried fruit at the end after it's done baking.


Oops...I forgot to take a picture of it when it was done. It pretty much looks like every other granola!

Printable Recipe

Dry Ingredients:
5 cups rolled oats (not quick oats)
1.25 cup sliced almonds
1 cup sesame seeds
1 cup chopped dried apples**
1.25 cup dried cranberries**

1/2 cup wheat germ
1/2 cup ground flax seed
1.5 cups unsweetened coconut flakes1 tsp salt
1tsp cinnamon

Wet Ingredients:

2 (4oz) packages applesauce (a little less than a cup)
1/2 cup coconut oil**
1 1/4 cup honey
1 1/2 tsp vanilla extract

**Possible substitutions:
1/2 cup coconut oil--- other oil such as canola or vegetable
1 cup dried apples---1 cup raisins or chopped dried apricots
1.25 cup dried cranberries--- 1.25 cup dried cherries, blueberries, raisins

Preheat oven to 300 degrees. Grease two cookie sheets with cooking spray or line with a silicone baking mat. Mix Dry Ingredients in an extra large bowl and mix well. Heat up wet ingredients on the stove top or in the microwave in a glass measuring cup. (I did the microwave so I wouldn't have to clean sticky honey out of one of my nice/new pots). Pour the hot, wet mixture over the dry ingredients and stir well. Spread evenly over the two greased cookie sheets. Bake for 40-60 minutes,or until golden brown. Stir mixture about every ten minutes. Cool completely and then store in an airtight container for up to 2 weeks.

Wednesday, February 22, 2012

Dragging My Feet on Potty Training


I'm having one of those yucky days. I've had a cold for over two weeks and it's really getting old. There hasn't been a lot of coughing, just mucus (gross, sorry!), stuffy sinus headaches, sneezing, and sleepless nights. Did I mention that Julian is sick too and has been waking up in the middle of the night every night. Well, last night he didn't wake up. The problem was, I couldn't fall asleep! My head was pounding and I could barely breathe. I think I fell asleep a little after 4am. Then, Julian woke up a little after 6am. Needless to say, I haven't accomplished anything today. I'm determined I will get "Dining Room" crossed off my Spring Cleaning List later today.

The point of this post was to talk about my lack of motivation to potty train Isabel. Every time I change her diaper (especially the stinky stinky stinky poopy ones) I tell her that we need to get her to go on the toilet. Then, I tell myself, "I will do it starting Monday". But, I don't. I know what I need to do. I just need to take away the diapers and let wear underwear so she can get used to the sensation. Honestly though...


  1. I really really don't want to clean up human urine and feces from all over the house. Am I being dramatic? Will it really not be that bad? 
  2. My second complaint is that Isabel says that she doesn't want to go in the potty. She's stubborn. She says she wants diapers. Does this mean I should wait? Is she not ready? I've made a potty chart with sticker, I've tried bribing her with a little piece of chocolate. They didn't make her want to do it.
  3. I can't really take away the diapers....They will still be right here for Julian.

That's pretty much all I have to say about why I don't want to potty train her. Somebody give me some advice/help.

3/12/12 Update: Isabel is fully potty trained!


Spring Cleaning: Less is More

"Have nothing in your house that you do not know to be useful or believe to be beautiful."
-William Morris

Thank you to Clover Lane for posting yet again about 40 days 40 bags! I am going to stop procrastinating about this, make a list, and just do it! Sarah made some great points, How do I want MY HOUSE to look? Less stuff, less clutter. Simpler, more organized. Ready for company at anytime, and ready for a showing if I were to sell my house tomorrow.

Stuff I threw out from the Pantry last week

More from the kitchen

MORE from the Pantry


Let me quickly explain the concept....

What You'll need:
  • Trash Bags (Sarah suggested black bags so you won't be tempted to look back through what you already got rid of.)
  • Paper Towels
  • Everywhere Cleaner
  • A mind that LESS IS MORE

What You'll Do:
  • Create a list that divides your house up into 40 (or less) areas.
  • Each day you will tackle one area, PURGING any stuff that you no longer need or use. My thought is, if I haven't touched it/worn it/used it in 12 months, we don't really need it. 
  • Sort items into 2 bags...1. Throw Away 2. Give Away
  • Tidy up the area with a new sense of relief and freshness!
  •  Relax or move onto the next room if you are still feeling energized.


"Bottom line is, if you do not use or need it, it's clutter and needs to go."
-Charisse Ward


I have a small place, just barely over 1000 sq ft. I probably won't need all 40 days, so my list only includes 31...that's all that would fit on the page! Some days might look light, but I want the goals to be achievable. If I get through that day's "area" quickly, then I can go ahead and clear the next one too. Some days might look heavy, but those are ones that will take more time. I have to be realistic...I also have to still take care of the kids, and any other plans or projects that we have going on.


My goal eventually is to stop collecting/purchasing so much "stuff", that I won't even have to do a full 40 day purge.

Growing Herbs: Part 1

I've been thinking for awhile about growing fresh herbs at home. We don't have any in ground area to plant, so it had to be something other than that. I've seen a ton of different cool ideas on Pinterest....herbs in mason jars, hanging upside down, herbs in a pallet.... Let me start by saying, I have never gardened or kept a plant alive in my LIFE. It's just not something I grew up knowing how to do. Google searches about herbs provided WAY too much information, and it was kind of overwhelming. I was finally feeling motivated after reading this post from Bloom Where You Are Planted, and also this one from Thy Hand Hath Provided. Thanks for giving me the extra push to get this project started! If Jane from Thy Hand can grow every fruit/veggie/herb that they eat, I can certainly grow a few herbs/fruits/veggies as well!

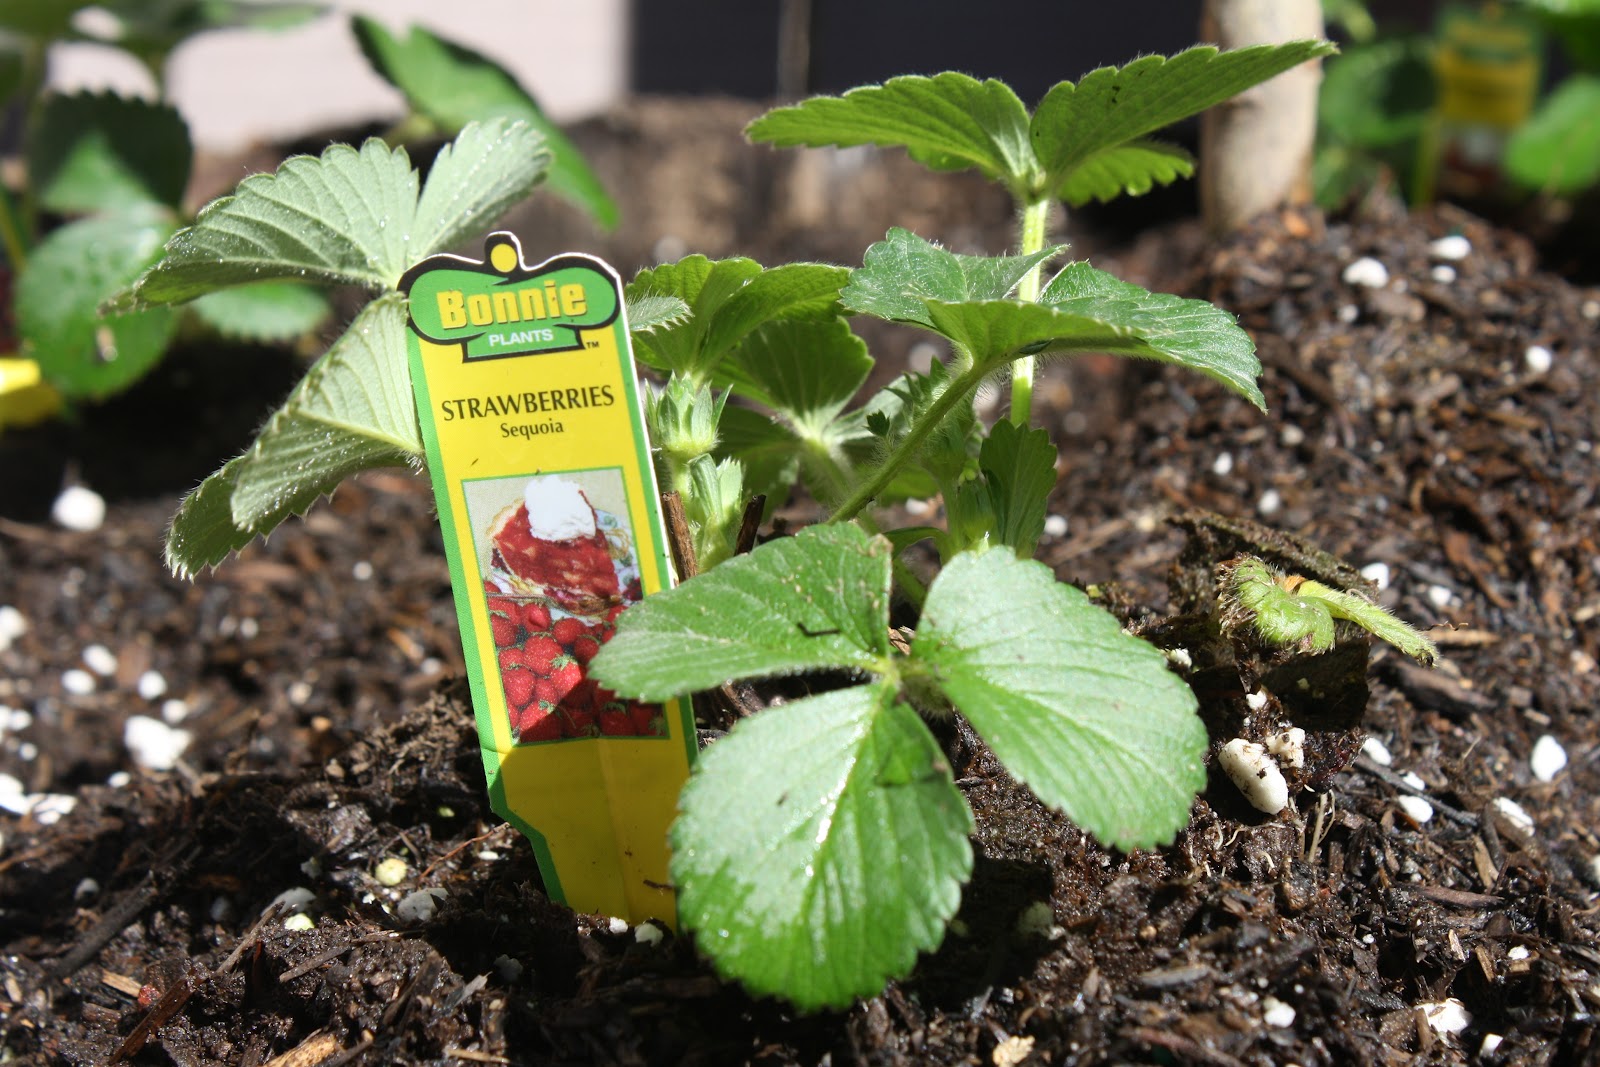
I decided to start with herbs. I went down to Home Depot today and picked the brain of this very nice lady (who talked a little too much, so much that now I'm going to get a dwarf citrus tree, tomatoes and strawberries too). She also gave me the best idea that did not involve carpentry work on the part of my hubby. I'm going to grow herbs in rain gutters mounted to the fence on my patio...Perfect!

The rain gutters come in ten foot long pieces (only $6.49 each). We are going to get two, and Adrian is going to cut them in half. We will have four, 5 foot planters on the fence. Our patio is on the east side of our condo building, which is exactly where it should be. The herbs need 6-8 hours of morning sun. I didn't purchase the rain gutters today because they won't cut them at the store, and I couldn't fit them in the car with the kids etc. That's okay though, because I purchased everything else.

Herb Seeds:
(I wanted everything organic but went to 3 stores and had to settle for non-organic on two)
$2.59 Italian Flat Leaf Parsley  (I never knew there were so many varieties!)
$1.59 Lavender
$1.59 Rosemary (Will be grown in a pot separate from my rain gutter- gets up to 6ft high!)
$1.99 Thyme
$1.99 Cilantro
$1.99 Oregano
$1.99 Basil (the regular kind, there's a million types of this too!)


Other:
$9.94 2 (1.5 cubic ft) large bags All Natural Potting Soil (I wanted Organic, but it was like 5 times the price...)
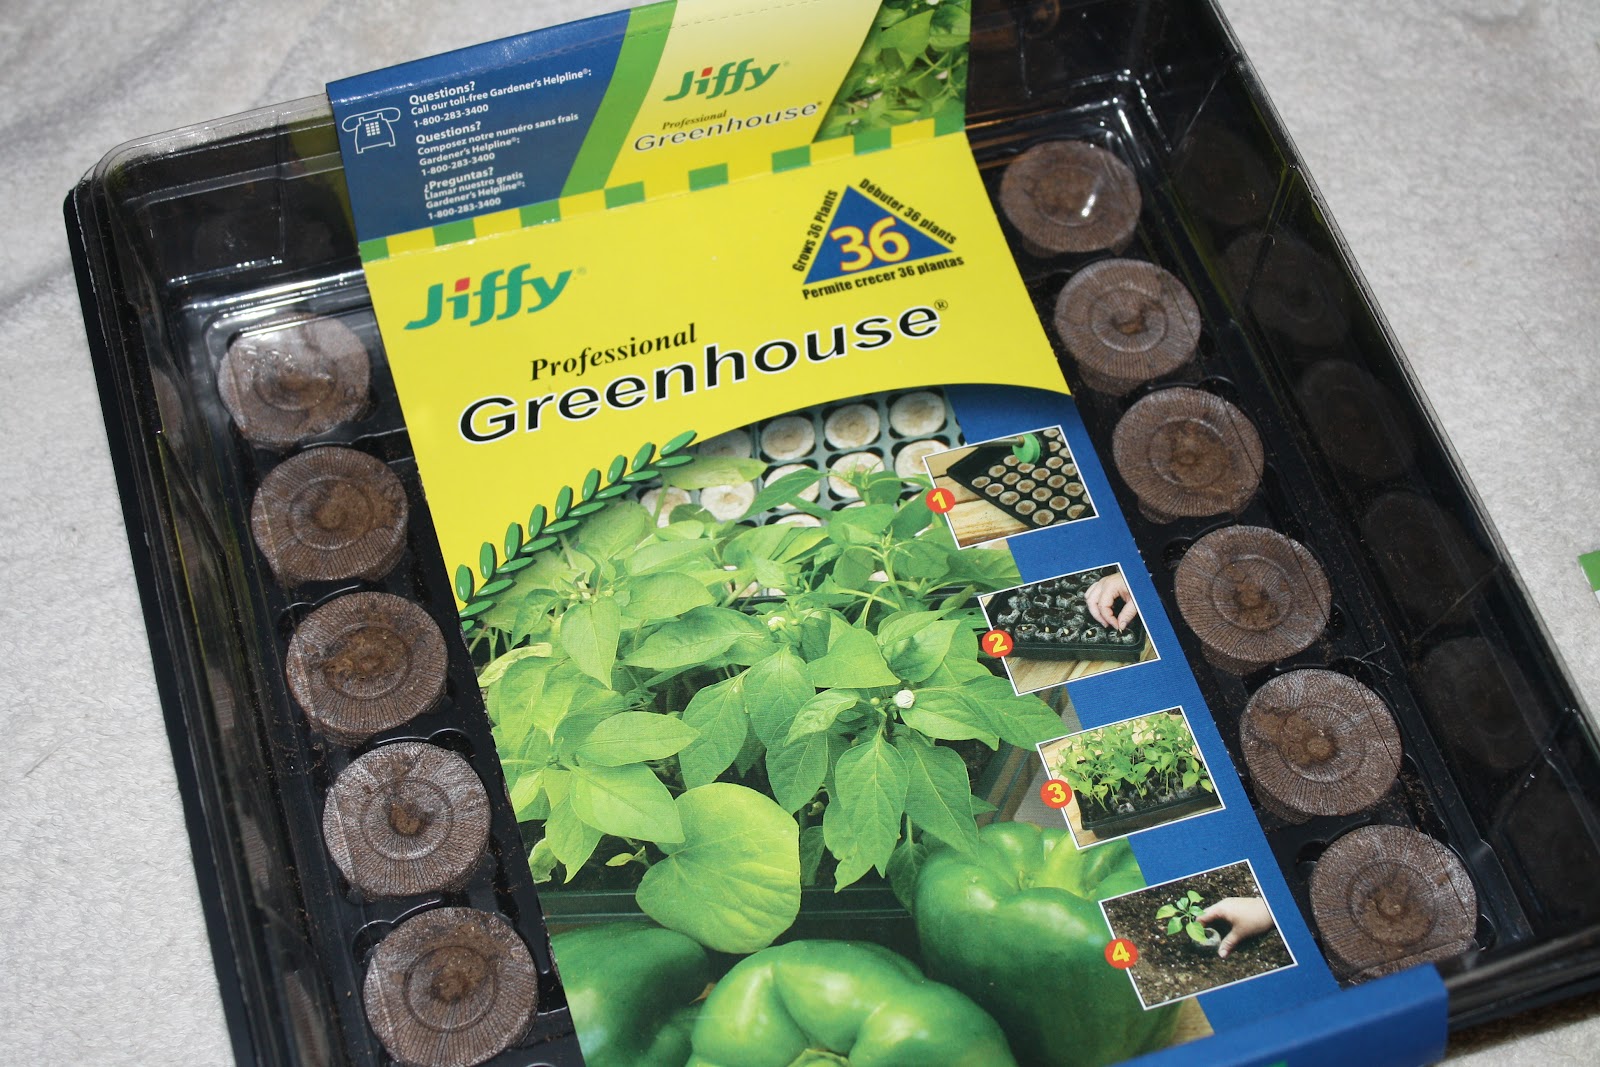
$4.29 (36 count) Peat Pellet Greenhouse
$12.98 2 (10 ft) rain gutters

TOTAL: $40.94


I started out by reading everything on the back of the packets. Based on where we live, we can start planting in Feb/March (NOW!). I made a chart with all of the information on the back of the seed packages. Much easier seeing all the info in once place. The information on the chart helped me to draw out the "design" of where I will plant what, and how many to plant of each.

This way I can maximize the planting space of my rain gutters, and make sure all of the plants are evenly spaced according to their directions. Also, I want to leave enough height room for each to grow.


Then, I drew out a map of how I will plant them. (I am a visual person, can you tell?) I tried at first to do the calculations in my head, but my lack of mom brain kicked in...I really couldn't wrap my head around it without drawing the map to scale. I'm not a good artist, as you can tell, but this helped a lot.

The fence pn my patio is 6 feet high, and I don't really want the herbs growing any higher than the fence. The rain gutters are 5 feet long each, so I will put two on each section of the fence. The first spaced 2 feet above the ground, and the next 2 feet above that. I want the most basil because I really want to make pesto, and that takes A LOT OF basil.

Going from left to right:
6 pods of BASIL starting at 5", and spaced 10" apart-- (5", 15", 25", 35", 45", 55")
4 pods of CILANTRO starting at 6" and spaced 6" apart-- (6", 12", 18", 24").
2 pods of PARSLEY starting at 36" and 12" apart-- (36", 48")
3 pods of OREGANO starting at 6" and 12" apart-- (6", 18", 30")
3 pods of THYME starting at 36" and spaced 8" apart-- (38", 44", 52")
3 pods of LAVENDER starting at 12" and spaced 28" apart-- (12", 30", 48")

The Rosemary will go in a pot, this one can practically turn into a tree- 6" high!

It all sounds pretty simple, but a lot of thought went into where to plant each, how much, and how to space them based- height and width.


Then I opened up the mini greenhouse, and labeled it based on how many pods of each herb I will need. Being an inexperienced gardener, I don't think I will be able to tell them apart at the next stage. I made a few extra of a couple so I can give them to my Mom.


The box has 6 pods across. I put a number on each tag of how many pods there are that specific herb. You can see some rows have only (3), like Thyme. There is also a label on the other side of the box for the other half of the row.


Then, I followed the directions on the box to "plump up" the pods. I poured just over 5 cups of warm water into the tray. It's hard to see in this picture, but it's filled with water.


Then, slowly the pods plumped up!

Until they had absorbed all the water, and looked like this. How cool! Isabel loved watching them "grow".


Next, we (followed more directions) "Gently pull back netting on top of pellets. Fluff and level surface peat. Sow 2-3 seeds per pellet. Cover lightly with peat." Isabel loved this part!


The oregano was probably the hardest for her...Look how small the seeds are! (That's a snack size ziploc bag.)


I was saying "look up here" and putting my hand above the camera, so she did the same thing. She was getting tired.


We placed them in a warm location away from direct sunlight.


That's it for now....we just wait! Could be a couple weeks for the next steps. While I wait for these to grow, I am going to do some more research on growing fruits and veggies.

I forgot to mention the yummy dinner Adrian made tonight! All it was missing was FRESH BASIL!


Related Posts Plugin for WordPress, Blogger...